====================================== Virtual All-in-one Duplex Installation ======================================
Overview
The All-in-one Duplex (AIO-DX) deployment option provides a pair of high availability (HA) servers with each server providing all three cloud functions (controller, worker, and storage).
An AIO-DX configuration provides the following benefits:
Only a small amount of cloud processing and storage power is required
Application consolidation using multiple containers or virtual machines on a single pair of physical servers
High availability (HA) services run on the controller function across two physical servers in either active/active or active/standby mode
A storage back end solution using a two-node CEPH deployment across two servers
Containers or virtual machines scheduled on both worker functions
Protection against overall server hardware fault, where
All controller HA services go active on the remaining healthy server
All containers and/or virtual machines are recovered on the remaining healthy server
Note
If you are behind a corporate firewall or proxy, you need to set proxy settings. Refer to Docker Proxy Configuration for details.
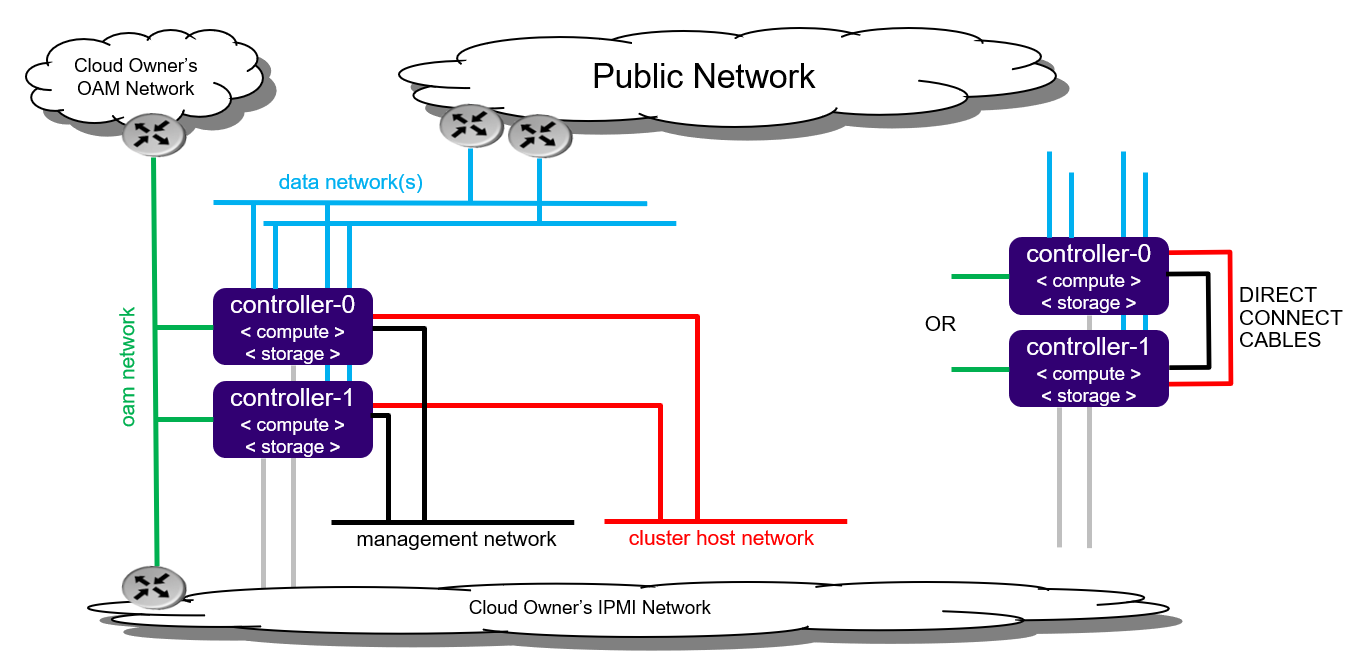
Figure 1: All-in-one Duplex deployment configuration
Note
By default, StarlingX uses IPv4. To use StarlingX with IPv6:
The entire infrastructure and cluster configuration must be IPv6, with the exception of the PXE boot network.
Not all external servers are reachable via IPv6 addresses (for example Docker registries). Depending on your infrastructure, it may be necessary to deploy a NAT64/DNS64 gateway to translate the IPv4 addresses to IPv6.
Refer to StarlingX IPv6 Deployment for details on how to deploy a NAT64/DNS64 gateway to use StarlingX with IPv6.
