Add SSD-Backed Journals Using Horizon
On storage hosts with SSDs or NVMe drives, you can use SSD-backed Ceph journals for improved I/O performance.
About this task
If you prefer, you can use the CLI. For more information, see Add SSD-backed Journals Using the CLI.
For more information about SSD-backed journals, see Storage on Storage Hosts.
Prerequisites
A storage host with a solid-state drive (SSD) or Non-Volatile Memory Express (NVMe) drive is required.
To create or edit an SSD-backed journal, you must lock the host. The system must have at least two other unlocked hosts with Ceph monitors. (Ceph monitors run on controller-0, controller-1, and storage-0 only).
Procedure
Lock the host to prepare it for configuration changes.
On the Hosts tab of the Host Inventory page, open the drop-down list for the host, and then select Lock Host.
The host is locked and reported as Locked, Disabled, and Online.
Open the Host Detail page for the host.
To open the Host Detail page, click the name of the host on the Hosts tab of the Host Inventory page.
Select the Storage tab to view the Disks and Storage Functions for the host.
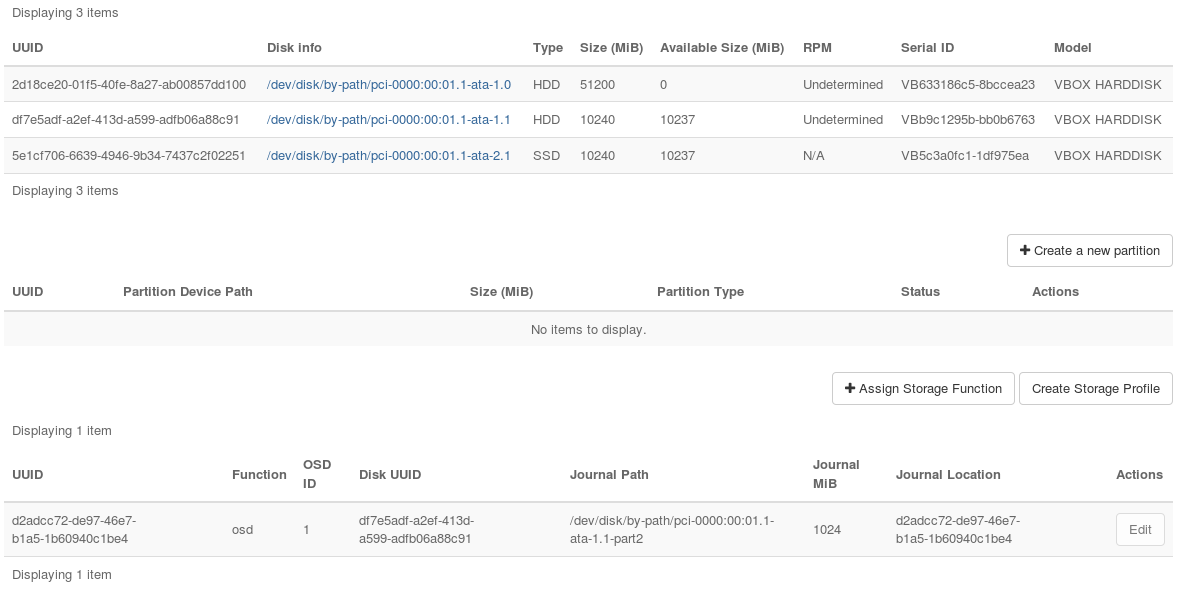
Assign the SSD to use for Ceph journals.
Note
This option is available only if the storage host is equipped with at least one SSD.
Click Assign Storage Function to open the Assign Storage Function dialog box.
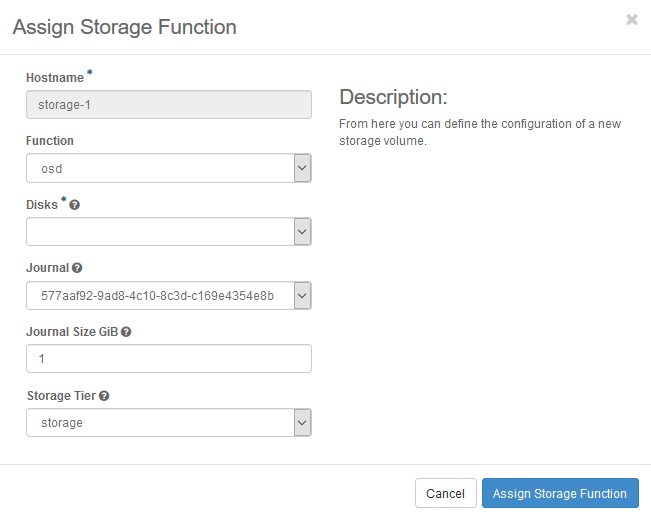
In the Function field, select Journal.
A simplified dialog is displayed.
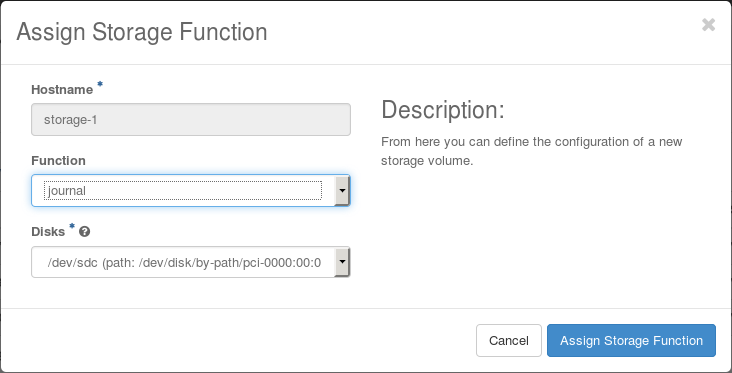
In the Disks field, select the SSD device.
Click Assign Storage Function.
The journal function is assigned to the SSD.

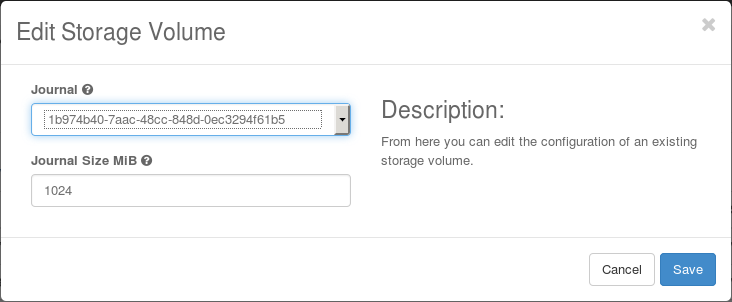
Assign the journal function for use by one or more OSDs.
Use the Edit button for the OSD to open the Edit Storage Volume dialog box, and then select the Journal to use with the OSD.
Unlock the host to make it available for use.
On the Hosts tab of the Host Inventory page, open the drop-down list for the host, and then select Unlock Host.
The host is rebooted, and its Availability State is reported as In-Test. After a few minutes, it is reported as Unlocked, Enabled, and Available.
