Access StarlingX OpenStack
Use local/remote CLIs, GUIs and/or REST APIs to access and manage StarlingX OpenStack and hosted virtualized applications.
Local CLI
Access OpenStack using the local CLI with one of the following methods.
Method 1
You can use this method on either controller, active or standby.
Log in to the desired controller via the console or SSH with a sysadmin/<sysadmin-password>.
Do not use
source /etc/platform/openrc.Set the CLI context to the StarlingX OpenStack Cloud Application and set up OpenStack admin credentials:
sudo su -
mkdir -p /etc/openstack
tee /etc/openstack/clouds.yaml << EOF
clouds:
  openstack_helm:
    region_name: RegionOne
    identity_api_version: 3
    endpoint_type: internalURL
    auth:
      username: 'admin'
      password: '<sysadmin-password>'
      project_name: 'admin'
      project_domain_name: 'default'
      user_domain_name: 'default'
      auth_url: 'http://keystone.openstack.svc.cluster.local/v3'
EOF
exit

export OS_CLOUD=openstack_helm
Method 2
Use this method to access StarlingX Kubernetes commands and StarlingX OpenStack commands in the same shell. You can only use this method on the active controller.
Log in to the active controller via the console or SSH with a sysadmin/<sysadmin-password>.
Set the CLI context to the StarlingX OpenStack Cloud Application and set up OpenStack admin credentials:
sed '/export OS_AUTH_URL/c\export OS_AUTH_URL=http://keystone.openstack.svc.cluster.local/v3' /etc/platform/openrc > ~/openrc.os
source ./openrc.os
Note
To switch between StarlingX Kubernetes/Platform credentials and StarlingX OpenStack credentials, use
source /etc/platform/openrcorsource ./openrc.osrespectively.
OpenStack CLI commands
Access OpenStack CLI commands for the StarlingX OpenStack cloud application using the openstack command. For example:
controller-0:~$ export OS_CLOUD=openstack_helm
controller-0:~$ openstack flavor list
controller-0:~$ openstack image list
Note
If you are using Method 2 described above, use these commands:
controller-0:~$ source ./openrc.os
controller-0:~$ openstack flavor list
controller-0:~$ openstack image list
The image below shows a typical successful run.
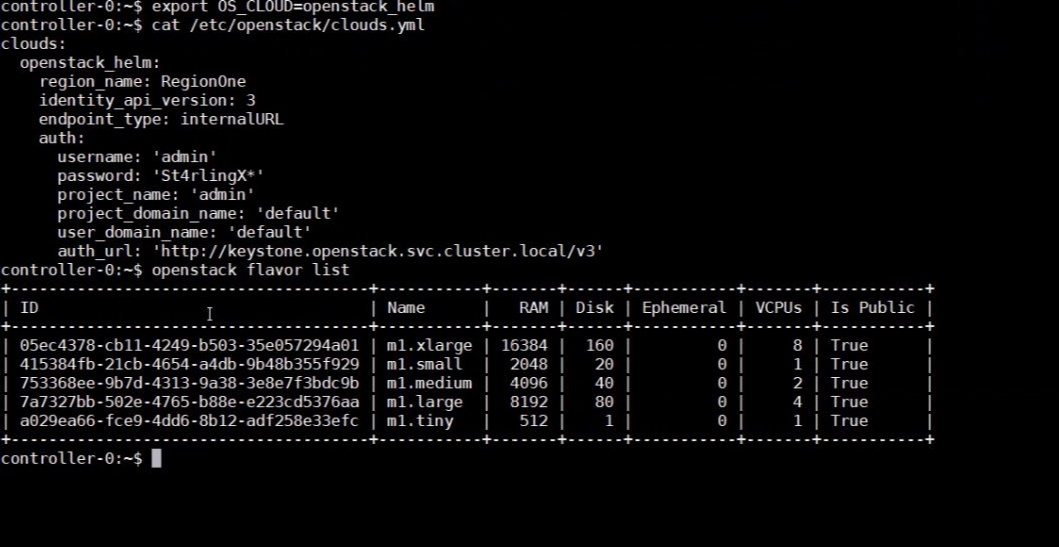
Figure 1: StarlingX OpenStack Flavorlist

Figure 2: StarlingX OpenStack Commands
Configure Helm endpoint domain
Containerized OpenStack services in StarlingX are deployed behind an ingress
controller (nginx) that listens on either port 80 (HTTP) or port 443 (HTTPS).
The ingress controller routes packets to the specific OpenStack service, such as
the Cinder service, or the Neutron service, by parsing the FQDN in the packet.
For example, neutron.openstack.svc.cluster.local is for the Neutron service,
cinder‐api.openstack.svc.cluster.local is for the Cinder service.
This routing requires that access to OpenStack REST APIs must be via a FQDN or by using a remote OpenStack CLI that uses the REST APIs. You cannot access OpenStack REST APIs using an IP address.
FQDNs (such as cinder‐api.openstack.svc.cluster.local) must be in a DNS
server that is publicly accessible.
Note
There is a way to wild‐card a set of FQDNs to the same IP address in a DNS server configuration so that you don’t need to update the DNS server every time an OpenStack service is added. Check your particular DNS server for details on how to wild-card a set of FQDNs.
In a “real” deployment, that is, not a lab scenario, you cannot use the default
openstack.svc.cluster.local domain name externally. You must set a unique
domain name for your StarlingX system. StarlingX provides the
system service‐parameter-add command to configure and set the
OpenStack domain name:
system service-parameter-add openstack helm endpoint_domain=<domain_name>
<domain_name> should be a fully qualified domain name that you own, such that
you can configure the DNS Server that owns <domain_name> with the OpenStack
service names underneath the domain.
For example:
system service-parameter-add openstack helm endpoint_domain=my-starlingx-domain.my-company.com
system application-apply stx-openstack
This command updates the Helm charts of all OpenStack services and restarts them.
For example it would change cinder‐api.openstack.svc.cluster.local to
cinder‐api.my-starlingx-domain.my-company.com, and so on for all OpenStack
services.
Note
This command also changes the containerized OpenStack Horizon to listen on
horizon.my-starlingx-domain.my-company.com:80 instead of the initial
<oam‐floating‐ip>:31000.
You must configure { *.my-starlingx-domain.my-company.com: --> oam‐floating‐ip‐address }
in the external DNS server that owns my-company.com.
Configure HTTPS Certificate
This certificate must be valid for the domain configured for StarlingX OpenStack.
Enable HTTPS for StarlingX, see Enable HTTPS Access for StarlingX REST and Web Server Endpoints.
Note
IF AND ONLY IF StarlingX OpenStack application is currently APPLIED when you do this, a StarlingX OpenStack application (re-)apply is internally triggered and fails because you have not setup the StarlingX OpenStack certificate yet.
Set the StarlingX OpenStack domain and configure your external DNS server, see Update the Domain Name.
Configure the StarlingX OpenStack certificate and configure StarlingX OpenStack services to use it, see Install REST API and Horizon Certificate.
Open port 443 in StarlingX firewall, see Modify Firewall Options.
Remote CLI
Documentation coming soon.
GUI
Access the StarlingX containerized OpenStack Horizon GUI in your browser at the following address:
http://<oam-floating-ip-address>:31000
Log in to the Containerized OpenStack Horizon GUI with an admin/<sysadmin-password>.
REST APIs
This section provides an overview of accessing REST APIs with examples of curl-based REST API commands.
Public endpoints
Use the Local CLI to display OpenStack public REST API endpoints. For example:
openstack endpoint list
The public endpoints will look like:
http://keystone.openstack.svc.cluster.local:80/v3
http://nova.openstack.svc.cluster.local:80/v2.1/%(tenant_id)s
http://neutron.openstack.svc.cluster.local:80/
etc.
If you have set a unique domain name, then the public endpoints will look like:
http://keystone.my-starlingx-domain.my-company.com:80/v3
http://nova.my-starlingx-domain.my-company.com:80/v2.1/%(tenant_id)s
http://neutron.my-starlingx-domain.my-company.com:80/
etc.
Documentation for the OpenStack REST APIs is available at OpenStack API Documentation.
Get a token
The following command will request the Keystone token:
curl -i   -H "Content-Type: application/json"   -d
'{ "auth": {
    "identity": {
      "methods": ["password"],
      "password": {
        "user": {
          "name": "admin",
          "domain": { "id": "default" },
          "password": "St8rlingX*"
        }
      }
    },
    "scope": {
      "project": {
        "name": "admin",
        "domain": { "id": "default" }
      }
    }
  }
}'   http://keystone.openstack.svc.cluster.local:80/v3/auth/tokens
The token will be returned in the “X-Subject-Token” header field of the response:
HTTP/1.1 201 CREATED
Date: Wed, 02 Oct 2019 18:27:38 GMT
Content-Type: application/json
Content-Length: 8128
Connection: keep-alive
X-Subject-Token: gAAAAABdlOwafP71DXZjbyEf4gsNYA8ftso910S-RdJhg0fnqWuMGyMUhYUUJSossuUIitrvu2VXYXDNPbnaGzFveOoXxYTPlM6Fgo1aCl6wW85zzuXqT6AsxoCn95OMFhj_HHeYNPTkcyjbuW-HH_rJfhuUXt85iytZ_YAQQUfSXM7N3zAk7Pg
Vary: X-Auth-Token
x-openstack-request-id: req-d1bbe060-32f0-4cf1-ba1d-7b38c56b79fb

{"token": {"is_domain": false,

    ...
You can set an environment variable to hold the token value from the response. For example:
TOKEN=gAAAAABdlOwafP71DXZjbyEf4gsNYA8ftso910S
List Nova flavors
The following command will request a list of all Nova flavors:
curl -i http://nova.openstack.svc.cluster.local:80/v2.1/flavors -X GET -H "Content-Type: application/json" -H "Accept: application/json" -H "X-Auth-Token:${TOKEN}" | tail -1 | python -m json.tool
The list will be returned in the response. For example:
 % Total    % Received % Xferd  Average Speed   Time    Time     Time  Current
                                 Dload  Upload   Total   Spent    Left  Speed
100  2529  100  2529    0     0  24187      0 --:--:-- --:--:-- --:--:-- 24317
{
    "flavors": [
        {
            "id": "04cfe4e5-0d8c-49b3-ba94-54371e13ddce",
            "links": [
                {
                    "href": "http://nova.openstack.svc.cluster.local/v2.1/flavors/04cfe4e5-0d8c-49b3-ba94-54371e13ddce",
                    "rel": "self"
                },
                {
                    "href": "http://nova.openstack.svc.cluster.local/flavors/04cfe4e5-0d8c-49b3-ba94-54371e13ddce",
                    "rel": "bookmark"
                }
            ],
            "name": "m1.tiny"
        },
        {
            "id": "14c725b1-1658-48ec-90e6-05048d269e89",
            "links": [
                {
                    "href": "http://nova.openstack.svc.cluster.local/v2.1/flavors/14c725b1-1658-48ec-90e6-05048d269e89",
                    "rel": "self"
                },
                {
                    "href": "http://nova.openstack.svc.cluster.local/flavors/14c725b1-1658-48ec-90e6-05048d269e89",
                    "rel": "bookmark"
                }
            ],
            "name": "medium.dpdk"
        },
        {

            ...
